Your gaming PC is a powerful, sophisticated machine. But over time, an insidious enemy begins to sabotage its performance from the inside out: dust. Dust clogs fans, insulates components, and slowly chokes your PC, leading to higher temperatures, louder noise, and lower frame rates. The solution is simple, but for a beginner, the thought of opening that expensive case can be terrifying. This is your ultimate beginner’s guide on how to clean your pc safely and effectively.
Don’t worry, you don’t need to be a computer engineer to do this. We will walk you through a simple, step-by-step process that anyone can follow. By the end of this guide, you’ll have the confidence to perform this essential maintenance task, ensuring your PC runs cool, quiet, and fast for years to come. Learning how to clean your pc is one of the most valuable skills a PC owner can have.
Why Cleaning Your PC is So Important
Before we get to the specifics of how to clean your pc, let’s quickly cover the “why.” Dust is more than just ugly; it’s an insulator.
- It Causes Overheating: A layer of dust on your CPU cooler or graphics card acts like a winter blanket, trapping heat. This forces your components to run hotter, which can lead to “thermal throttling”—your PC intentionally slowing itself down to prevent damage.
- It Reduces Performance: That thermal throttling directly translates to lower FPS and stuttering in games. A simple cleaning can often restore lost performance.
- It Shortens Component Lifespan: Running components at consistently high temperatures can reduce their lifespan. A clean PC is a happy and long-lasting PC.
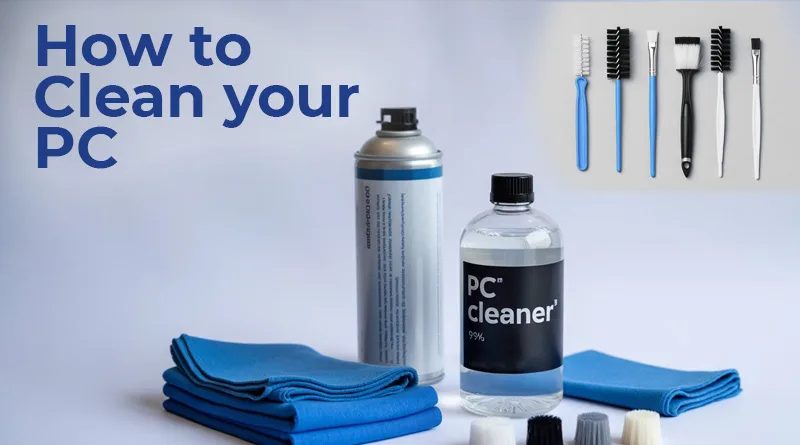
Your PC Cleaning Toolkit: The Must-Have Supplies
Having the right tools makes all the difference, and it’s a critical part of learning how to clean your pc safely. Using a household vacuum cleaner is a huge mistake that can create static electricity and kill your components. Here is the essential, safe toolkit.
- Can of Compressed Air: This is your #1 most important tool. It’s perfect for safely blasting dust out of fans, heatsinks, and tight crevices without any physical contact.
- Isopropyl Alcohol (90% or higher): For cleaning grime off thermal paste or stubborn spots, 90% or higher Isopropyl Alcohol is the professional’s choice. It cleans perfectly and evaporates without leaving any residue.
- Microfiber Cloths: You’ll need these for wiping down the outside of your case, your side panel, and for use with the alcohol. They are soft, lint-free, and won’t scratch your components.
- Anti-Static Wrist Strap: This is a cheap but crucial piece of safety equipment. Static electricity can permanently damage your PC’s sensitive components. An anti-static strap grounds you and eliminates this risk.
- Small, Soft Brushes: For dislodging stubborn dust that compressed air can’t, a set of small, soft-bristled brushes is invaluable.
You can often find these items in a convenient, all-in-one PC Cleaning Kit on Amazon.
The Step-by-Step Guide to Cleaning Your PC
Follow these steps in order for a safe and thorough cleaning. This is the core of our guide on how to clean your pc. The entire process should take about 20-30 minutes.
Step 1: Power Down and Prepare Your Workspace
- Shut down your computer completely. Don’t just put it to sleep.
- Unplug all cables from the back of the PC, including the main power cord.
- Move the PC to a well-ventilated area, like a garage or even outside. You’ll be kicking up a lot of dust.
- Ground yourself. Put on your anti-static wrist strap and clip it to a metal part of the PC case. It’s crucial to understand the risks of electrostatic discharge (ESD), which can permanently fry your components. Reputable sources like Intel have detailed guides on the importance of anti-static precautions. [EXTERNAL LINK]
Step 2: Clean the Exterior and Filters
- Use a microfiber cloth to wipe down the entire exterior of the case.
- Most PC cases have removable dust filters on the front, top, and bottom. Slide or pop these off. You can wash these with water, but make sure they are 100% dry before putting them back in.
Step 3: Open the Case and Do a “Bulk” Dusting
- Unscrew the thumb screws on the back of your PC and remove the main side panel.
- Take your can of compressed air. Holding it upright, use short bursts to blow out the large, loose dust bunnies from the bottom of the case and from around your components. The goal is to get the big stuff out first.
Step 4: Detail Cleaning – The Components
This is where we focus on the most important parts.
- Case Fans: Hold the fan blades gently with one finger to stop them from spinning. Use compressed air to blow the dust off the blades and out of the fan housing.
- CPU Cooler: This is the large heatsink with a fan on it near the top of your motherboard. It’s often a major dust trap. Blow compressed air through the fins of the heatsink from all angles.
- Graphics Card (GPU): Your GPU has its own fans and heatsink. Just like the CPU cooler, hold the fans and blow the dust out from between the blades and through the heatsink.
- Motherboard and RAM: Gently blow any remaining dust off the main circuit board and your RAM sticks.
Step 5: Reassemble and Tidy Up
- Put the side panel back on and screw it in.
- Move your PC back to your desk.
- This is the perfect time to improve your setup. Before you plug everything back in, consider your cable layout. A clean PC deserves a clean desk. Our guide to gaming desk cable management can help you finish the job.
- Plug everything back in and power up your PC. Enjoy the cooler, quieter performance!
Conclusion: You Now Know How to Clean Your PC
Congratulations! You now know how to clean your pc like a pro. This simple, 30-minute task, performed every 6-12 months, is one of the best things you can do to maintain the health and performance of your gaming rig. It’s a fundamental part of owning a powerful computer and a key element in creating the ultimate gaming setup.
A clean PC is a fast PC. This is just the first step in optimizing your machine. For more advanced tweaks, be sure to check out our upcoming ultimate guide to a faster gaming PC.